
Removing an Oil Pan from a KJ Jeep Liberty WITHOUT Removing, or 'Lifting' the Engine!
The Jeep KJ Liberty is a relatively easy vehicle to work on. The biggest obstacles tend to be rust and the sometimes wacky documentation. The later of which can sometimes be a bit overdone. Take removing the oil pan. The factory service manual for the Liberty says you have to remove the engine (wtf??). The other repair manuals have some poppycock about lifting the engine. It’s Crazy!
NOT ONE BIT OF THAT IS EVEN NECESSARY!!!
Here are we have the steps on how to do it the easy way.
Start by raising the front of the Jeep securely with jack stands and drain the oil.
Carefully tie the transmission cooling lines back out of the way. You can only get about an inch by doing so, but it will make a BIG difference.
Next If you have a 4 wheel drive model, you probably have to remove the front axle assembly Then remove the transmission support bracket at the back of the pan
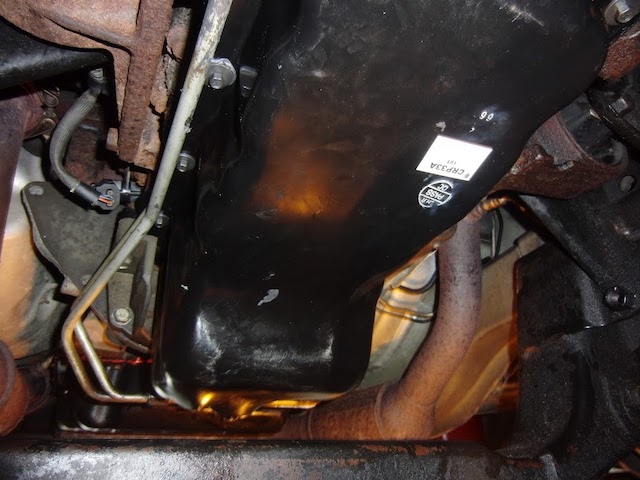
Remove the bolts for the pan noting the locations of the studs if any.
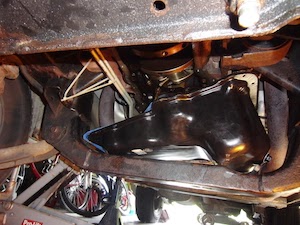
Separate the pan and gasket from the block.
Now for the secret bit. There are two nuts and one bolt that have to removed under the oil pan. They hold the pickup tube and splash pan in place. The splash pan is attached to the gasket.
Note: The red circles showing the Nut and bolt locations.

Here you can see the pickup tube bolt
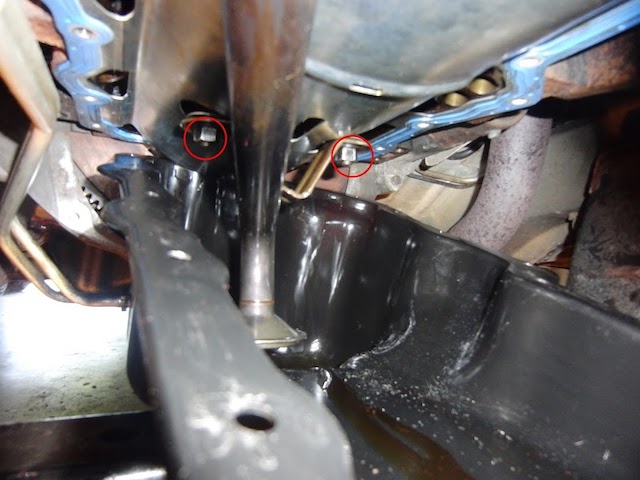
Here is the pick up tube nuts
Access is easy by just wiggling the pan around. They are 13 mm, and you have to reach around the pan to get to them. A ratcheting wrench works well with them.
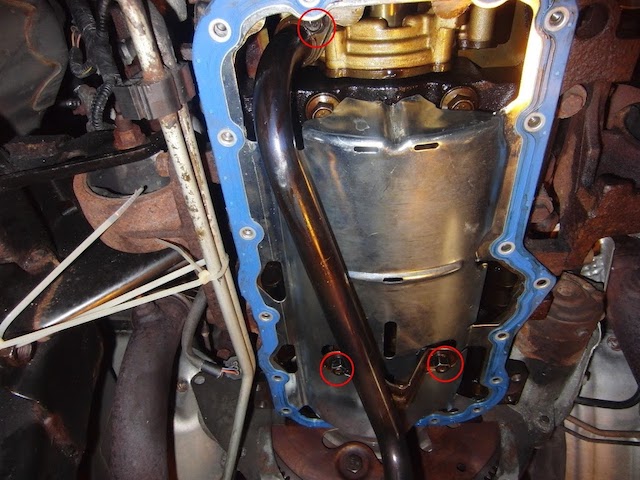
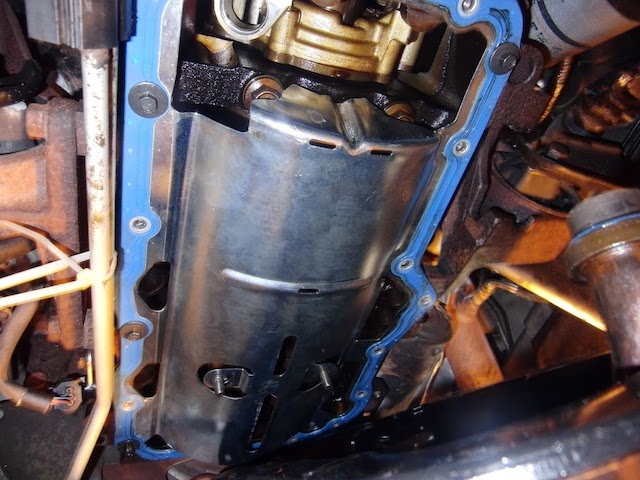
Here is a view with the oil pan removed so you can see what is actually going on
Once the bolts and nuts are off, just let the pickup tube fall into the pan. You’ll remove all three, the pan, pickup tube, and splash plate/gasket assembly. They will have to be put back in together as well.
Now the tricky bit. To get it out, turn it so the thin part is facing the passenger side and slide it between the engine and the support beam, now wiggle it forward and it will come out. It might take some wiggling, but it will come out.
Here is a video showing how it can be done:
And there you have it. Pretty simple.
Installation is pretty much the reverse. But a couple of tips:
When putting it back together, put a few bolts in the gasket to hold it in place, the put the two splash plate tube nuts ( again reaching inside the pan ) on but loosely until you get the pick up tube bolt fully installed.
Remember to remove the pan bolts from the gasket before putting the pan on
Also make sure you follow the repair manual on where to put the RTV ( it doesn’t go all the way around ) and the torque specs for all the bolts. And make sure you put the bolts with the studs back in the correct places.
Hopefully this little guide will save someone a lot of time and/or money. But having said that, the standard disclaimer applies. I take no responsibility for you success or failure in this procedure, and if you hurt your self, someone else, or your Jeep, I assume NO responsibility .